AutoREALM comes with many predefined symbols and even more collections can be found for download. But what if you want to create a symbol set of your own? Don't worry. This will teach you how to do it.
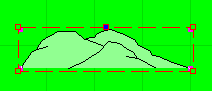
Let's say you have drawn something on your map and you feel you may want
to use it again. First select it and if you haven't already grouped it
![]() it may be
a good idea to do so.
it may be
a good idea to do so.
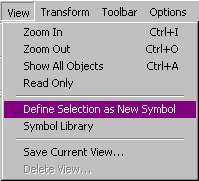
With the symbol to be selected just klick the "Define Selection as
Symbol" button ![]() or
select it under the "View" menu.
or
select it under the "View" menu.
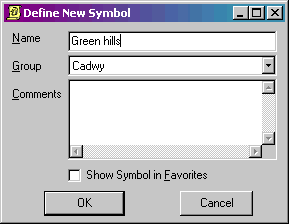
Now you get a popup where you can select a description of you symbol, which group it should be added to and a short comment. You can also select if you want the symbol to be shown first in the viewbar (select "Show Symbol in Favorites").
To enter the symbol library just click on the Symbol Library button
![]() or select "Symbol Library" from the "View" menu.
or select "Symbol Library" from the "View" menu.
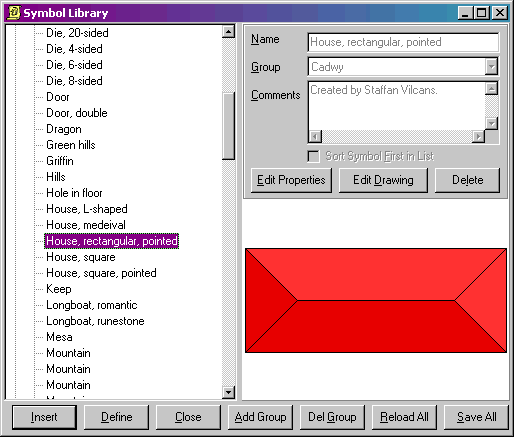
Here you can do a lot of things with the symbol libraries. You can browse trough all the available symbols. It the bottom is a row where you can select "Insert" to place the displayed symbol on your map. "Define" to add the currently selected object(s) as a new symbol (see above). "Close" to close the popup. "Add Group" is interesting. If you want to start a new group you click on this and give the group a good name. "Del Group" is obvious. "Reload All" will reload all the symbol groups from disk (and erase all you've done unless you have saved your work). "Save All" saves all you've done to disk. Thi is done automaticly when you close AutoREALM, but it's always a good idea to save just in case.
At the top right you can select to "Edit Properties". Here you can change the name of the symbol, move it to another group or edit the comment. Using "Edit Drawing" you can make changes to the symbol and "Delete" is quite obvious.
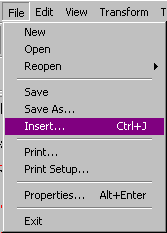
AutoREALM has the ability to import graphics. The best way would be to use WMF files since AutoREALM is based on vectors, but bitmaps can be used too. Just go to File -> Insert (or Ctrl-J). Under "Files of type" you can select between AuR, AuRX, WMF/WMF, BMP and JPG.
If you insert a bitmap picture (BMP or JPG) you can set the fill colour
to the background colour or the bitmap to get a transparent background.
![]()
When you have created your own symbol library it would be nice if you
would share it with other users of AutoREALM. You will find the file with
your symbols located in the directory C:\Program
Files\AutoREALM\Library.
The easiest way to change the colour of symbols are to just select the symbol

and then use the colour selector ![]() to change the main and fill colours.
to change the main and fill colours.

This method works find on symbols that only have one fill colour. However if the symbol has several different fill colours

The result probably isn't what we want.

To handle symbols with more than onw fill style we have to use colour translation.